Welcome to Haute Kippy - crochet craft and more!

If you're looking for ready made accessories available for purchase now, please contact me via email, or facebook. A selection of items from my design cache can be purchased directly from me locally, at craft shows or via mail. I am also available to for custom design work or commission to construct any published pattern. I accept all major credit cards and PayPal and I always ship for free!

If you're a fellow crafter, then you've come to the right place. Enjoy free access to all my crochet patterns, recipes and craft projects by navigating the tabs below or use the social media buttons to connect with me. You can also find clean, printer friendly PDF downloads of all my most popular crochet patterns available for purchase on Etsy and Ravelry!

Thanks for stopping by!
                              
Showing posts with label child. Show all posts

Tuesday, October 17, 2017

Jailen Puff Hat


Hey there!

This post contains affiliate links, which benefits my blog when you click on them or subsequently make a purchase. Thanks for supporting more FREE content from Haute Kippy! 

Is the weather starting to turn in your neck of the woods yet? Our fall foliage is so beautiful, and we've had an unseasonable warm streak to enjoy it! I hope that wherever you are, you are having a beautiful autumn. To continue with our "Season of Hats" I have a very special children's hat for you today.

Hat Pictured in I Love This Yarn in Purple

The request for this hat came from the very sweet friend of my cousin. Her daughter is just the cutest, and she has a beautiful head full of springy, bouncy, natural black hair. She loves to wear winter hats, but there aren't any in the stores that can accommodate her luscious locks. She loves the idea of bun hats, but can't find any with two holes instead of one.

I've said it before and I'll say it again, necessity is indeed the mother of invention. When you need something, and can't find it, make it! (Or crochet it)

Now my friend's daughter and my Little One are about the same age. Though she has the wrong kind of hair to get the desired affect, I used Little One as a model and guinea pig to make the Jailen Puff Hat. So named for the self described "puffs" of hair that my little client loves to sport as part of her favorite hair-do.

Pictured in I Love This Yarn in Grape and Red Heart Super Saver in Pink

I wanted to make sure that the hat was warm and comfy, had cute styling and most importantly could accommodate those two puffs of hair. If your little love has straight hair, feel free to adjust the size of the holes on the sides of the hat making them slightly smaller.

This design features the same fun bobbles as the Kip Bun Hat, with a knit look brim, and of course two big and cozy holes at just the right place for pigtails or hair puffs!

If you have a natural haired little beauty of your own but don't crochet, please's don't fret. Although I have converted my online sales to patterns only, I still make and sell ready made goods. I sell locally, at craft shows, and through the mail. I take all major cards and PayPal and I always ship for free. If you need a Jailen Puff Hat (or any item I've designed) you can contact me on Facebook, or via email.


As always this crochet pattern is free! If you would like to own a clean, printer friendly PDF Download it can be purchased from my Etsy Shop or click the   button to get it from my Ravelry Store.

Now let's get started! 


  • Yarn: I Love This Yarn 
  • Hook: H8/5mm 
  • Gauge: 6 sts = 2" in HDC or 1 bobble repeat = 1"
  • Materials: Tapestry needle
  • Difficulty: Easy
  • Finished size: child/toddler apx. 16" before stretching

These are the type of tapestry needles I use. Yarn needles are often too big for successfully weaving in ends, and worst of all most of them are plastic. Great for kids and beginners, not so much for hard core crocheters. Trust me a big metal needle makes all the difference!


Special Stitches:

  • Hdc Inc- half double crochet increase, make two hdc in the the next st
  • Bobble Stitch - yo, insert hook into next st, yo, draw up loop, yo, draw thru two loops, *yo, insert hook into same st, yo, draw up a loop, yo, draw thru two loops*, repeat** two more times, (5 loops on hook) yo, draw thru all loops. Bobble will poof out behind work.
  • Work in the third loop- make stitch indicated in the long horizontal bar found on the wrong side of the hdc stitch as opposed to the "v" in the top of the stitch.

Note: Ch at end of round does not count as a st, always make first st of next round in same st as join. Bobbles will not be aligned otherwise.

Pictured in Red Heart With Love in Mango

Form a magic ring.

Round 1: hdc 10 into magic ring, join with a sl st, ch 1. (10 sts)

Round 2: make hdc inc in each st around, join, ch 1. (20 sts)

Round 3: *hdc, hdc inc*, repeat ** around, join, ch 1. (30 sts)

Round 4: *hdc, hdc, hdc inc*, repeat ** around, join, ch 1. (40 sts)

Round 5: *hdc, hdc, hdc, hdc inc*, repeat ** around, join, ch 1. (50 sts)

Round 6: *hdc 10, hdc inc*, repeat ** four times, hdc in remaining 6 sts, join, ch 1. (54 sts)

Round 7: hdc 11, ch 5, skip next five sts, hdc 22, ch 5, skip next five sts, hdc in remaining 11 sts, join, ch 1. (two holes made)

Round 8: hdc in each st and ch around, join, ch 1. (54 sts)

Round 9: TURN work, sc, bobble, *sc, sc, bobble, sc, sc*, repeat ** around until one st remains, sc in last st, join, turn, ch 1. (18 bobbles made)

Rounds 10 & 11: sc in each st around, join, ch 1. (54 sts)

Round 12: repeat round 9.

Rounds 13 & 14: repeat rounds 10 & 11.

Round 15: repeat round 9.

Rounds 16 & 17: repeat rounds 10 & 11.

Round 18: repeat round 9.

Round 19: hdc in each st around, join, ch 1. (54 sts)

Round 20: hdc in the third loop of each st around, join, ch 1.

Round 21: sc in the third loop of each st around, join, ch 1.

Round 22: sl st loosely around brim, join, fasten off, weave in ends.

Enjoy your Jailen Puff Hat! If you would like more free patterns, visit my friends over at allfreecrochet.com, they have lots of fun hats and other patterns for you to choose from, as well as a variety of children's hats. 

Enjoy!

xo, Bethany

Tuesday, March 14, 2017

Easy Fishnet Gloves


They say, "necessity is the mother of invention". In my house this is literally true. More often than not when someone needs something or something needs to be repaired, I find a way to create, fix, or rig up the item instead of buying new. I really enjoy being industrious. It's a fun challenge and is a satisfying way to be frugal. I would always rather make something we need with materials on hand instead of searching, shopping or waiting for an item. And nothing is more fun to make yourself than costumes!


This leads us to "Spirit Week". Schools have these a couple times per year and they are super fun. Kids have themed school days for which they are encouraged to dress up. I love helping my daughter put together fun Wacky Wednesday or Nerd Day outfits. Recently, one of our Spirit Week days was 80's day! 80's fashion was so fun and flashy, it remains a staple costume theme and I don't think it's going anywhere any time soon. 

My daughter's 80's costume was based on the popular athletic style trends. We found an off the shoulder cropped sweater, and layered it with a studded tank top. Then we added leggings, and of course- leg warmers! I made my legwarmers (pictured below) a long time ago when I was first learning how to crochet, and there's no pattern for them, unfortunately. If you need a legwarmer pattern, visit allfreecrochet.com and search their amazing database of free crochet patterns to find the perfect legwarmers for your 80's costume or to complement your winter wardrobe! 

We also did a side ponytail and added her big cheerleading bow for fun. Her football team's colors are orange and black so with all that pink, we needed to add one more accessory in orange to complete the look.

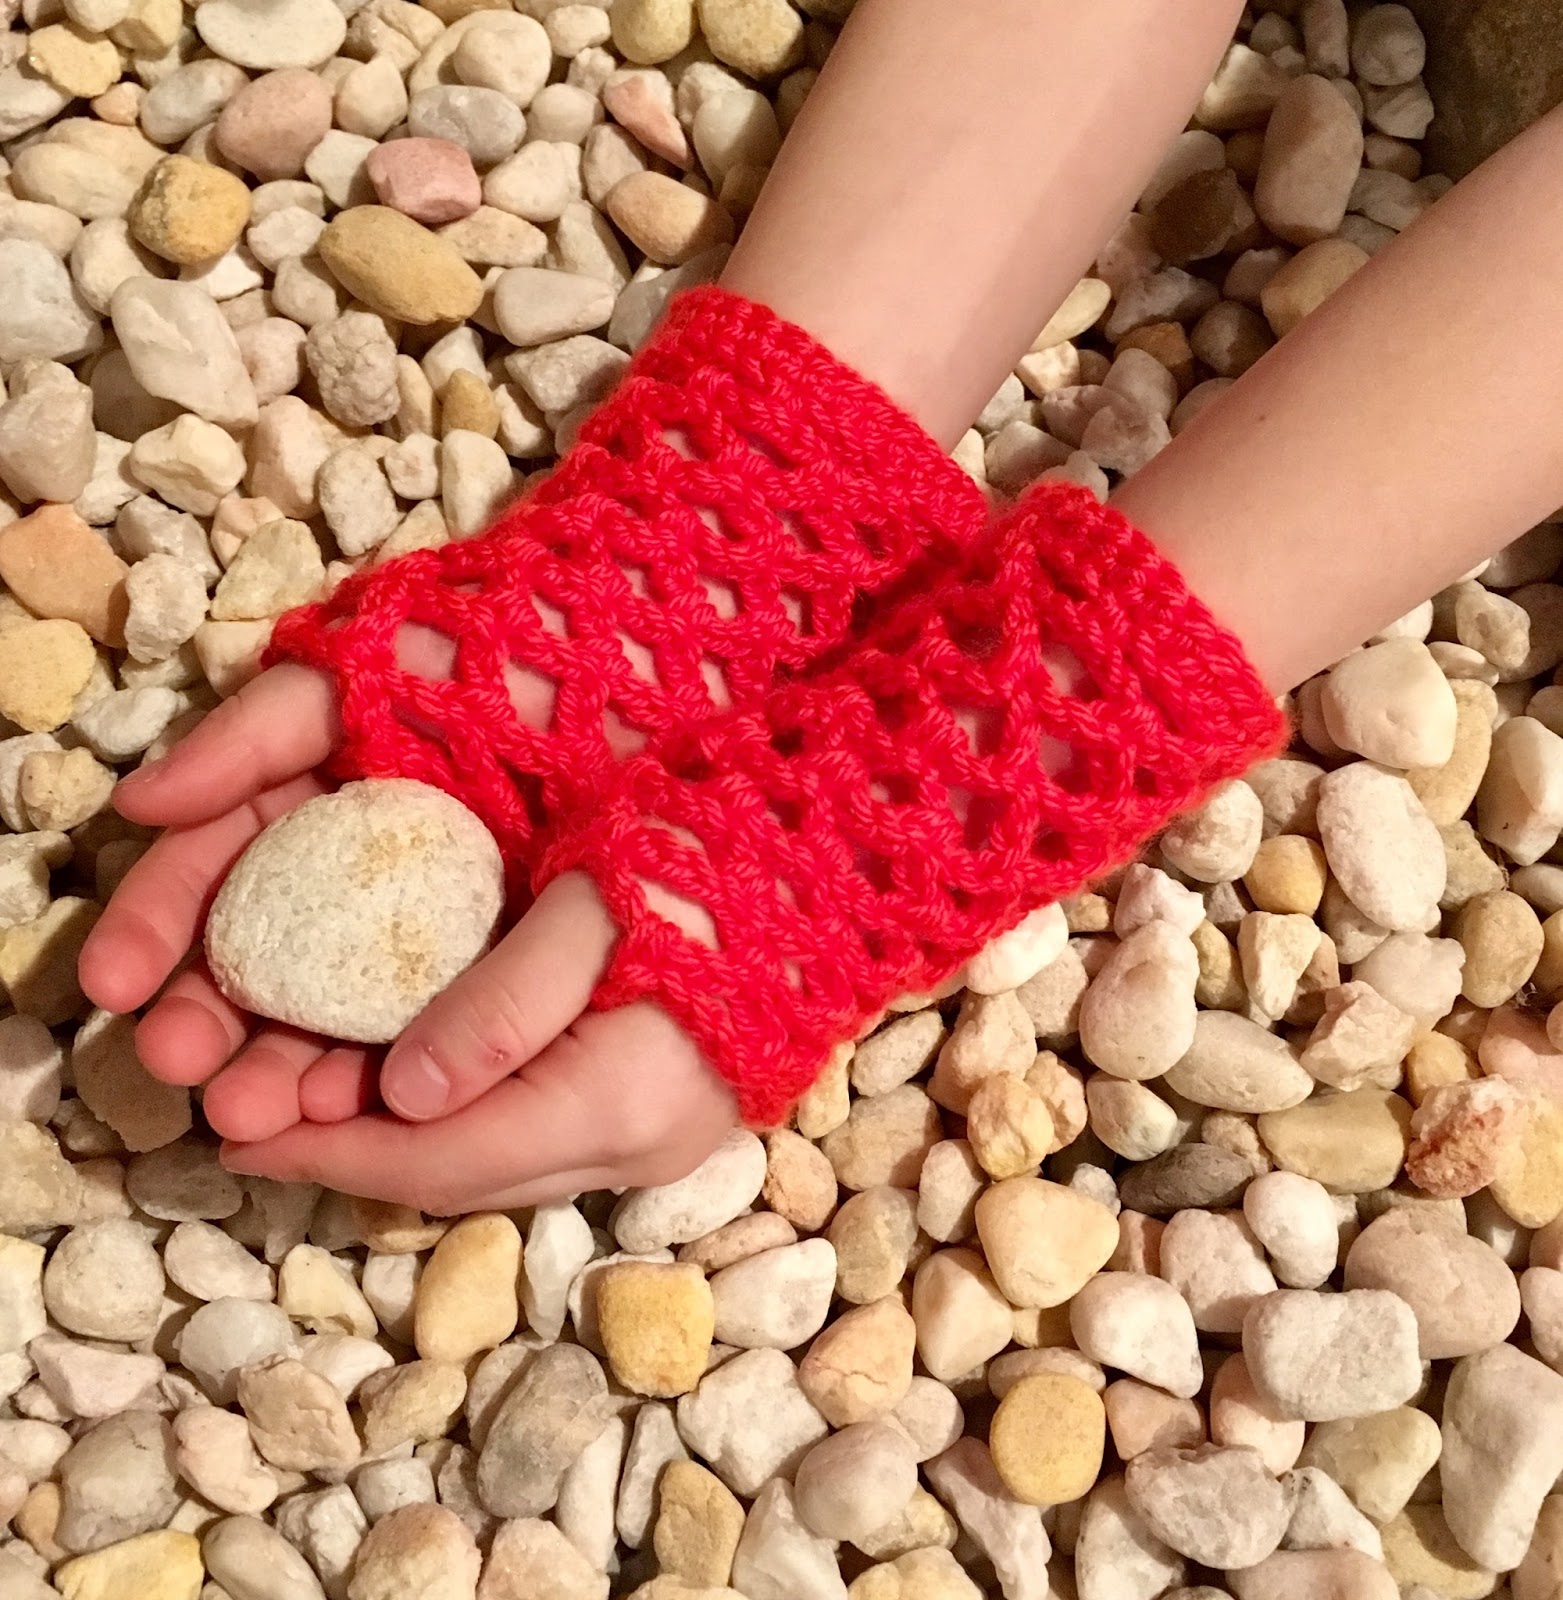
I knew I wanted to make her some fishnet gloves. What could be more 80's? The night before 80's day, I figured I'd skim the interwebs for free crochet patterns to see what I could find and whip up for her. I did find a couple on Ravelry, and they looked OK, but I wasn't completely satisfied and they didn't come in children's sizes. So I played around and came up with my own easy pattern for fishnet gloves. Really, our family motto should be, "If you can't find what you want, make it yourself!" So, thanks to 80's day, here's another fun pattern for the crochet world!

The 80's fishnet costume gloves are worked using a very simple method, mostly chaining, and can be easily resized for a custom fit for any person, any age, any size hand! The netting is worked using a base row with a multiple of three. No complicated thumb holes, simply use any opening in the netting. They can be worn long up the arm, or low on the hands. Add or delete rounds for a custom length. Try in a cool neon variegated yarn for a very 80's look!

To make these gloves for an adult simply measure the hand/wrist, check the pattern gauge and work accordingly in a corresponding multiple of three. The pattern as written fits a child's hand 6-8 years. 


Easy Fishnet Gloves Free Crochet Pattern


Hook: E4/3.5mm

Yarn: Any Medium/Worsted Weight

Gauge: 8 sts = 2” fhdc

Measurements: Child size, as written is 6 ½” around, 5 ½” long  

Difficulty: Easy

Special Stitches:

Fhdc- Foundation Half double crochet: ch 2, yo, insert hook into 2nd ch from hook, yo draw up a loop, yo draw thru first loop on hook (same as making a ch 1), yo draw thru all loops (first fhdc made). To continue fhdc: *yo, insert hook thru “v” on top of last st made, yo draw up a loop, yo draw thru first loop on hook, yo draw thru all loops*. Repeat ** to desired # of sts.

Note that beginning chain and foundation row will be made simultaneously with this method, and the work will fall vertically from your hook as it is formed. The V’s closest to and facing your hook hand will be the top of the stitches that you work into for the next round, the v’s on the opposite side, are the bottom of your work when held horizontally. If you need further assistance with this stitch, please search for and watch tutorial videos on YouTube.

If you just aren't feeling it and don't want to fhdc, simply make a foundation ch in appropriate number of chs, join, and then hdc into each ch, join, and then continue pattern at round 2. Easy peasy.

Abbreviations:
Sl st - slip stitch
Sk - skip
Ch - chain
Ch sp - chain space
Prev. - previous
Sts - stitches

Netting pattern multiple x3:
To resize pattern for larger or smaller hand: see gauge, measure hand/wrist, round number of sts needed up or down to make a multiple of 3, work accordingly.

Round 1: Fhdc 27, join with a sl st. Use the starting tail to join the bottom edge of the foundation round.

Round 2: *ch 4, sk 3 sts, sc in next st*, repeat ** around to last 3 sts, ch 2, dc in first ch made (at join from prev. round).

Round 3: *ch 4, sc in next ch sp*, repeat ** around to last ch sp, ch 2, dc in top of dc from prev. Round.

Rounds 4-12: Repeat Round 3 or to desired length, fo, weave in ends.

Use any hole in netting for thumb hole.

You may use this free crochet pattern to make and sell items, please do not redistribute or re-write it in any way. You must credit me with the design on any sales of finished product. This written pattern is an original work (c) 2017 Haute Kippy by Bethany Sypolt

Did you enjoy using this free pattern? Support Haute Kippy and the creation of more free patterns with a thank you gift of $1.00 donate securely and safely with PayPal at paypal.me/HauteKippy

Share your work on Instagram #hautekippy or post a picture on my Facebook page! Find me on Ravelry, Pinterest or AFC!

Select ready made items from my design cache along with printer friendly, ad free PDF downloads of my most popular crochet patterns are available in my Etsy shop!

Enjoy!
xoxo, -Bethany

Monday, February 13, 2017

Toddler Quick Mitts


My little one loves to wear mittens. She also loves pockets. If a shirt or pants have pockets in them she gets very excited and wants immediately to hide her little hands. I've bought some small mittens for her in the past, and we always seem to loose one of the pair. Where it goes, we'll never know. 


Northern West Virginia winters are long, gray and a mixture of snow, rain, sunless days and varying temperatures. One week, we expect snowfall, the next moderate temps and intermittent rain. It's super fun.... not. As a rule of thumb in our family, we wear coats until April. Just because it's randomly 56 degrees today doesn't mean you can run around coat-less. It's not good for the body, and roller coaster highs and lows contribute a lot to decreasing people's immune systems. 

We can also experience very cold temperatures. Two winters ago, we had an arctic blast that still shows its visible scars on many trees and bushes. It was so cold that even some evergreens were dying. Driving down the road, I can still see many people's trees and bushes have dead branches on their lower third where the sub-zero air and snow touched them. A reminder of that bitter cold winter. 


This is why children need mittens. They need super cute mittens, easy mittens- ones you can whip up yourself in minutes. That's what I did for my little one when I realized she might need them, and the only pair I could find was no longer a pair! 

These Toddler Quick Mitts can be made using any worsted weight yarn, and a size H8/5mm hook. Employing the same techniques as the adult Quick Mitts, these baby versions are sized down for a 2-3 year old and completely cover little fingers, keeping them safe and toasty warm. 

Of course if you live in a warmer environment, or you need your toddler to be able to play on a tablet or phone while wearing mittens, simply stop and fasten off at the last row before the decreases to make chic little fingerless versions. 


Make it unique:
-Try in a colorful variegated for even more fun! 
-Use remnants for a fun and quirky boho style stash buster project!
-Stripe the rows for an easy exercise in color work!
-Customize or alternate colors for team spirit! 

Let's get started!


Toddler Quick Mitts Free Crochet Pattern


Hook: H8/5mm
Yarn: Any Worsted
Notions: Yarn needle
Gauge: 6 sts=2” in hdc
Size: 2-3 Years (6 ½” from fingertip to cuff and 7” around palm)
Difficulty: Easy


Special Stitches:
Hdc2tog- Half double crochet two together: yo, insert hook into st, yo, draw up a loop, yo, insert hook into next st, yo, draw up a loop (5 loops on hook) yo, draw through all loops. Hdc decrease made.


Notes: Left and Right Hand gloves are made identically, except for thumb hole round. See instructions for more details. Joined rounds are worked as follows: make first hdc in next st (after join), at round end, make final hdc in join st. On thumb rounds only, joins are left unworked.


CUFF:
Chain 7
Row 1: hdc in third ch from hook, and in each st across, ch 2, turn. (5 sts)


Row 2: hdc in the blo of each st across (5 sts), ch 2, turn.


Rows 3-12: repeat row 2. Ch only 1 for end of row 12. Do not break yarn.


Fold cuff in half  to form a tube, lining up stitches. Working through both layers, sl st through the back loop and front loop of both ends to sl st the cuff together into a tube shape. Pivot cuff to work along raw edge, keeping right side facing. Ch 1, sl st loosely and evenly around raw edge of cuff (19 sts) do not join, ch 1.


MITTEN:
Rounds 1- 2: hdc in each st around, join, ch 1. (19 sts)


Round 3 FOR RIGHT HAND MITT: hdc, ch 2, sk next 2 sts, hdc in each st around, join, ch 1. (17 sts + 2 st space) Thumb hole made.


Round 3 FOR LEFT HAND MITT: hdc in each of the first 16 sts, ch 2, sk next 2 sts, hdc in last st, join, ch 1. (17 sts + 2 st space) Thumb hole made.


Round 4: hdc in each st around, join, ch 1. (19 sts)


Rounds 5-8: repeat round 4


Round 9: hdc2tog, hdc2tog, hdc in each of next 6 sts, hdc2tog, hdc2tog, hdc in each of remaining 5 sts, join, ch 1. (15 sts)


Round 10: hdc2tog, hdc in each of next 4 sts, hdc2tog, hdc2tog, hdc in each of remaining 3 sts, join, ch 1. (11 sts)


Round 11: hdc2tog four times, hdc, hdc2tog, join, fo. (6 sts) Sew small hole shut with yarn tail, weave in ends.


THUMB:
Round 1: join with a hdc to bottom edge of thumb hole, and hdc evenly around as follows: hdc 2 along bottom edge, pivot, hdc 2 along side, pivot, hdc 2 along top, pivot, hdc 2 along side, join, ch 1. (8 sts)


Round 2: hdc around, leave last st unworked, join ch 1. (7 sts)


Round 3: hdc2tog around, leave last st unworked, join, fo. (3 sts)  Sew small hole shut with yarn tail, weave in ends.

I hope you enjoyed making the little love in your life an adorable and warm pair of winter mittens! Share your work with me on facebook, instagram or pinterest! #hautekippy

xoxo- Bethany


ad